Tuesday, June 25, 2013

Not Your Bakery Birthday Cake


Since I am now home all the time there is time to do things like make our own Birthday cakes! It may not be all glamor and perfectly perfect like the ones from the bakery but I think they are more special when they come from mom- or in this case from Mom and DAD. So I gotta share them both. The last one we did was for our 9 year old. I came up with a Barbie in bed with a "scrap quilt" for a cover.
I will show you the steps we took in making this cake. The easy way out was taken for the cake itself. This is a box cake mix! I normally make my cakes  from scratch- no boxes for me. I let the hubby bake the cake though for this. 
 
We cut the top off the cake and set it aside. (Do not throw this away!)
 
Then we laid Barbie down (no pic of this) and cut an outline around her. Then scooped out the cake to form a cavity for her to lay in.
 
Apply a partial "white sheet" (White Frosting) to the top part of the "mattress" that will be showing.
 
Cut a giant Marshmallow in half and use 1/2 for her pillow. Sorry no pillowcase!
 
 
Lay Barbie in her cavity now. We bought a $5.00 Barbie with a swimsuit on. We left her dressed so there was no obscene pictures taken! :)
Then we packed some of the chunks of cake back around her legs.
 
Then we put the unquilted blanket on top of her (the top of the cake we cut off.)
 
Then add a base of white.
 
Now for the "quilt". We put blobs of white frosting in 6 bowls. You know those stir in color/flavor packets that you can buy for frosting now? There were coupons out a while back for totally free packets. I had 6 coupons so I got all different flavors!  I didnt think about possibly needing to only put part of a packet in each bowl so as not to over do it with flavor. Luckily it wasnt bad. Everybody said it tasted fine! ( I cant eat it because of my diabetes)
So the quilt was 6 flavor & color scraps.
 
Just ignore everything else for a minute in the pictur except for the licorice. We used licorice strings/laces for the quilt to frame each square in.
The hubby added the gummy bears beside Barbies pillow.


I think Barbies bed looked pretty comfy in the end!
 
Ok so for the cans of frosting and the bowl  of gumballs you seen in one of the above pictures- well she wanted Birthday treats for her class at school....
 
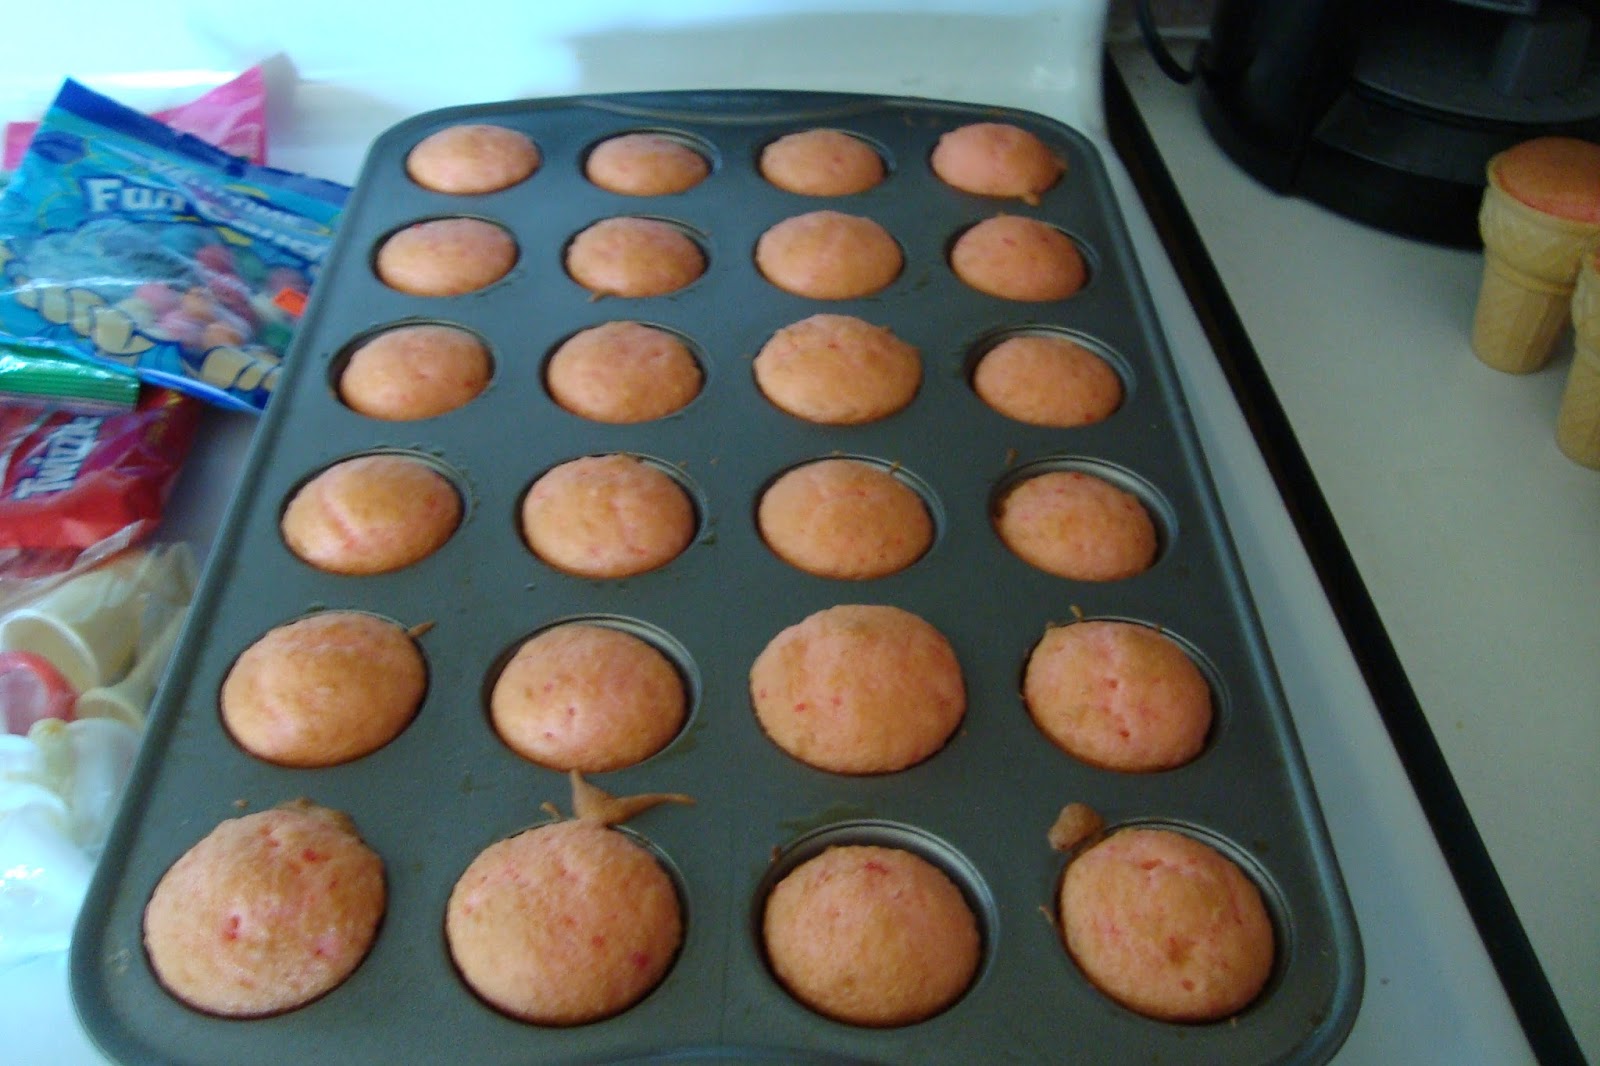
First there comes mini cupcakes
 
Then comes the Ice cream cone cupcakes.
 
Then a dab of frosting on each cone and cupcake.
 
The mini cupcakes get flipped upside down on to the cones.
 
This is where the cans of frosting and gumballs come in to the picture! Ice cream cone cupcakes. No Icecream involved.
 
My next post will be the other cake we did for my 16 year old.


Thursday, May 16, 2013

My First Post On My New Blog

Well here we go....my very first post on my new blog!

I've been slowly trying to "create" again. It's been sooo long since I have really felt like I could take the time to do the stuff I enjoy. I know that I would truly be happy if I could just "create" every day. If I had the a space to do it in, a space to call my own-well that would be even better!
Anyways, I wont bore you right off the bat with a bunch blabbing. I've been getting into repurposing things, recycling, upcycling....I seem to look at things lately and they almost instantly become something else!

I just finished turning a book into this cool jewelry holder/display. Have you ever looked at a book and seen a jewelry display? This is my first one. It's kind of scrappy but like I said it's my first.


This is what you gotta do to make one:
 
1) Gather your supplies
 *Find a hardcover book that is in good solid condition. (One that you never plan on reading!)
* Lots of glue. You just need a liquid glue that dries clear. For this first project I just used glue that I had on hand- some puzzle glue and some Mod Podge.
*About 6 paper Clips
* A brick or other flat heavy object to sit on the book
*Anything that you might want to use to decorate it with. I used faux suede scrapbook paper, seed beads, jewelry wire, fabric covered wire, polymer clay, gold paint, little plastic earring trees, jeweled button covers and printouts from my computer.
 
2) Here's how you do it:
* Open your book up to as close to the middle as you can get it.
*To determine how many ring holder rolls you are going to have do a dry test and roll 2 pages together at a time, tucking them under. I did 9 rolls so I kept 18 pages seperate. Take these pages and paper clip them together standing up in the center of the book. These are the pages you will not glue down.
*Next I glued down the last 10-15 pages on each side of the book. Start on one side and  glue the bottom page to the book cover and then each page after that until you have the 10-15 pages glued down. I spread glue over the whole page to glue them down. Place your heavy object on top of the pages and let dry.
*Do the next side.
 
3) After that is dry then I coated the rest of the sides of the pages with glue. Partially because I thought It may take me forever to glue down only a few pages at a time. I left the heavy object on top of the side I was coating too by the way.  Let Dry. Then do the next side the same way.
4) Time to roll the pages for the ring holders. I rolled 2 pages at a time and ran some glue on the underside edges to stick them down. Let all this dry now. Then.....
5) Have Fun Embellishing!!